
Warning: There are things to update here, please come back later to have a better experience 🙂
Why you need a quick guide to set up your computer and why you need a productivity system? Meet my Linux productivity set up
This year began an exciting chapter in my life: Working on a great software development company and working towards a Master’s Degree in Robotics.

Part of this adventure is related to heavy programming and simulations, which need to be very close to a very important piece of hardware: The Graphics Processing Unit (GPU).
When setting mine up, I totally blew up my screen image, I lost my Graphics User Interface (GUI), and wouldn’t get it back easy. I had to reset my computer.
But let’s not get to that high level of computing complexity.
 Our work, study, or both may depend heavily on a set of computer programs and in any Operating System (SO) you could have any kind of accident, viruses, bad commands, a computer too slow, a dead hard drive, etc. that will require a full reset of your PC, or maybe you just bought a new computer and want it in the same state you have your computer right now.
Let’s imagine this scenario: you are working in an important project, a deadline is very close, Linux is free, wild and sometimes unexpected, and you need to do some task, but suddenly something fails and you encounter an unexpected error:
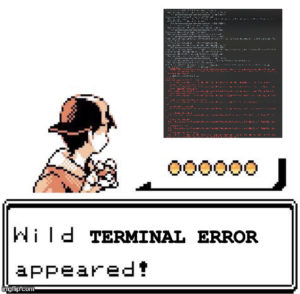
So you do what experimented programmers usually do, search in Google and Stackoverflow, to find a solution to that issue and keep working on, but from one moment to the next you are just pasting lines and running lines in the terminal, to see if the error is fixed. Then reboot or run again your code and something is very wrong, you lost your screen, like I did, some configuration is ruined or simply you have versions conflicts that require to set 100 packages versions by hand.
Whatever your problem may be, you should have a quick guide to set up your PC that helps you save as much time as possible, not because it’s tedious or boring, but because many of us just need the optimize time as much as possible. Any new set up takes a lot of time and thinking and searching on the web.
So let my show you my quick set up:
Setting up:
A little advice: Identify and document what you need installed in your computer and make a single .sh file that install everything for you with as many user work as possible, trust me on this one, this saves time.
If you don’t know how to do it, I’ll put it at the end
Summary:
1. Identifying software (is better to be writing it in a log and write it every time you install a program)
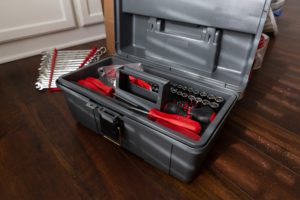 Utils: your toolbox,
-
- Productivity: any software that helps you be productive and do more in less time 😀, including other software dependencies in my case:

- CopyQ, Albert, Powerline, Terminator, Fish, Oh-my-fish, Bobthefish, Bass, Todoist, Google Chrome and Google Keep
- Others: Any other software not related to productivity or work, like games or emulators or
- Productivity: any software that helps you be productive and do more in less time 😀, including other software dependencies in my case:
2. Document in the easiest way as possible how you installed each piece of software, and where did you get the installation instructions from
Try to make a “guided tour” that you just follow without having to think much about it or research, every single step should be there and the sources. Why the sources? Because if any step fails in the installation process you can go directly to the source of the software and see any changes in the requirements, it simplifies the searching a lot!
In my case, you can see a detailed example in the next section: Guided tour: a Step-By-Step manual to follow quickly.
3. (Optional) An elegant and pro solution: do your setup as close to a single enter as possible
There’s a saying that the best engineers are lazy, they accomplish more by doing less, follow the path of lesser effort.
Suppose there is an ideal where all your software is installed with a single enter, then reproduce it as best as you can, automate the steps and relax while your computer does this work or you.

When you work in a UNIX based system like Linux or MacOS, a great amount of software is installed by command line like this:
sudo apt install my-cool-software
or
brew install my-cool-software
This is something you can automate very easily with an script in a .sh file.
But there’s an even more elegant solution, you can make yourself a git with not only the .sh file to run, but also with a README.md to help you follow the installation of any step that is beyond that script, and even make sub-folders with additional information and set ups to categorize stuff you need and to discriminate easy something to install or not, but having it ready for when it comes in handy.
In my case, you can see a detailed example in the last section:My set up in git: A repository to myself for modular installation or simply go to this link.
My Guided tour: a Step-By-Step manual to follow quickly
Keep this guide in some cloud service that you can access easily from any device. If it is in your damaged Hard drive is not that
Remember this is my personal guide, yours should be personalized to your neeeds.
- Install ubuntu linux:
- Follow this link but stop before Step 6, go to 6b with this config:
- Base: 125GB hard drive of SSD:
- 1000 Bios | 8000 swap | 25000 /home | 86455 /root
- If you forget something:
- /boot – 1GB(1000): Primary | Beginning of this space | Ext4 journaling file system | /boot
- swap – 4GB(4000): Logical | Beginning of this space | swap area
- /home – 25GB(25000): Logical | Beginning of this space | Ext4 journaling file system | /home
- / – Remaining (100GB): Logical | Beginning of this space | Ext4 journaling file system | /
- Base: 125GB hard drive of SSD:
- Follow this link but stop before Step 6, go to 6b with this config:
- Login to your browser with your preferred bookmarks and shortcuts already set
- Mozilla sign in
- Menu -> customize -> uncheck title bar (I hate the title bar)
- Search for this guide in there in git, google docs , or go directly to your page, and find it in your blog
- Productivity first: (this is my preference)
- Google Chrome and google Keep: (I like to have a second option for browser and I use google keep)
- Download and install google chrome: https://www.google.com/chrome/
- Sign in
- Go to apps -> Right click on Google keep => Create shortcuts
- Add Google Feep to favorites
- Todoist:
- From: https://snapcraft.io/todoist
$ sudo snap install todoist
- From: https://snapcraft.io/todoist
- CopyQ: This is a multiclipboard, it keeps history of what you copy and allows you to acces it easy
- Go here and search for install: https://github.com/hluk/CopyQ
$ sudo add-apt-repository ppa:hluk/copyq$ sudo apt update$ sudo apt install copyq- Preferences -> Autostart
- Go to Ubuntu Settings -> Keyboard shortcuts -> “+”
- Name: CopyQ
- Command copyq toggle
- Shortcut: Ctrl + alt + c
- Go here and search for install: https://github.com/hluk/CopyQ
- Albert: This is a search software, one of it’s main features is a web search that makes it worth it!
- Follow https://albertlauncher.github.io/installing/#using-official-albert-repositories
$ sudo curl "https://build.opensuse.org/projects/home:manuelschneid3r/public_key" | sudo apt-key add -$ sudo echo 'deb http://download.opensuse.org/repositories/home:/manuelschneid3r/xUbuntu_20.04/ /' | tee /etc/apt/sources.list.d/home:manuelschneid3r.list$ sudo curl -fsSL https://download.opensuse.org/repositories/home:manuelschneid3r/xUbuntu_20.04/Release.key | gpg --dearmor | tee /etc/apt/trusted.gpg.d/home_manuelschneid3r.gpg > /dev/null # sudo$ sudo apt update$ sudo apt install albert
- Settings -> Extensions -> Websearch -> “+” (I won’t put some delicate links here)
-
Kanban Board Projects	              kb	  <link to board>
Arcos Wiki	                        w	    <link to wiki>
Arcos Git	                          agt	  <link to git>
Arcos Pub                           git	  apg	<link to pub git>
Arcos Cloud	                        acl	  <link to cloud>
Jitsi Sistemas de control avanzado  jsc	  <jitsi link>
Jitsi Programacion Avanzada	        jpa	  <jitsi link>
PRIS Cloud	                        pcl	  <link to cloud>
Jitsi Fede	                        jfd	  <jitsi link>
Whatsapp Webb	                      ww	  https://web.whatsapp.com/
Calendar	                          cal	  https://calendar.google.com/calendar/u/0/r?pli=1
Jitsi Reunion Maestria 2021-2022	  jms	 <jitsi link>
Gmail	                              gm	  https://mail.google.com/mail/u/0/#inbox
GitLab	                            gl	  https://gitlab.com/
OneDrive	                          od	  <your link to OneDrive>
OneNote	                            on	  <your one note>
GoogleDrive	                        gd	  https://drive.google.com/drive/my-drive
MV1	                                mv1	  https://mv1.mediacionvirtual.ucr.ac.cr/my/
-
- Follow https://albertlauncher.github.io/installing/#using-official-albert-repositories
- Terminator: A flexible terminal that allows to have multiple windows at view at the same time
- Docs: https://terminator-gtk3.readthedocs.io/en/latest/#
- From here: https://dev.to/xeroxism/how-to-install-terminator-a-linux-terminal-emulator-on-steroids-1m3h
$ sudo add-apt-repository ppa:gnome-terminator$ sudo apt-get update$ sudo apt-get install terminator$ sudo snap install --classic code
- Fish: A shell with a lot of command simplifying and other features (Bash problem resolved ahead!)
- From here: https://launchpad.net/~fish-shell/+archive/ubuntu/release-3
$ sudo apt-add-repository ppa:fish-shell/release-3$ sudo apt-get update$ sudo (echo "/bin/fish") >> /etc/shells$ chsh -s /bin/fish. # this doesn't work never- Right click on Terminator -> Preferences -> Profiles -> Command
- Check: Run as a login shell
- Check: Run a custom command instead of my shell
- Custom command: /bin/fish
- When a command exits: Hold the terminal open
- Add Abbreviations:
-
$ abbr -a armv	sudo apt autoremove
$ abbr -a cd.	  code .
$ abbr -a clr	  clear
$ abbr -a gupd	sudo apt-get update
$ abbr -a gupg	sudo apt-get upgrade
$ abbr -a linup	sudo apt-get update; and sudo apt-get upgrade -y
$ abbr -a rviz	ros2 run rviz2 rviz2
$ abbr -a upd	  sudo apt update
$ abbr -a upg	  sudo apt upgrade
$ abbr -a sts   git status
$ abbr -a pll   git pull
$ abbr -a psh   git push $argv
$ abbr -a cmt   git commit -m $argv
$ abbr -a add   git add $argv
$ abbr -a ckt   git checkout &argv
$ abbr -a bckt  git checkout -b &argv
-
- From here: https://launchpad.net/~fish-shell/+archive/ubuntu/release-3
- Oh-my-fish: it works with fish, helps with with, and is require for bass!
- From here: https://github.com/oh-my-fish/oh-my-fish
$ curl -L https://get.oh-my.fish | fish
- From here: https://github.com/oh-my-fish/oh-my-fish
- Bobthefish: A theme to help with visuals
- From here: https://github.com/oh-my-fish/theme-bobthefish
$ omf install bobthefish$ pip install --user powerline-status
- From here: https://github.com/oh-my-fish/theme-bobthefish
- Bass: This allows fish to work with any bash!!
- From here: https://github.com/edc/bass
$ omf install bass
- From here: https://github.com/edc/bass
- Google Chrome and google Keep: (I like to have a second option for browser and I use google keep)
- Utils second, using the shortcuts and aid from the productivity software
- Curl, Git, Xclip and Clinfo:
$ sudo apt install curl # https://curl.se/ - or - $ apt search curl$ sudo apt install git # https://git-scm.com/ - or - $ apt search git$ sudo apt install xclip # https://git-scm.com/ - or - $ apt search xclip$ sudo apt install clinfo # https://github.com/Oblomov/clinfo - or - $ apt search xclip
- Git ssh: (easier than put your password and login everytime)
- From here: https://docs.gitlab.com/ee/ssh/
$ cd .ssh$ ls -la- You will see no key
$ ssh-keygen -t ed25519 -C "<COMPUTER_NAME>"- [Enter] – PASSWORD -> save this pw!
- – Your identification has been saved in /home/hp/.ssh/id_ed25519
- – Your public key has been saved in /home/hp/.ssh/id_ed25519.pub
- From here: https://docs.gitlab.com/ee/ssh/#add-an-ssh-key-to-your-gitlab-account
$ sudo apt install xclip$ xclip -sel clip < ~/.ssh/id_ed25519.pub- Then follow the rest of the link on point: 2.Sign in to GitLab
- Your key is here:
$ cat .ssh/id_ed25519.pub
- From here: https://docs.gitlab.com/ee/ssh/
- Pip: python package installer
- From here: https://pip.pypa.io/en/stable/installing/
$ sudo apt install python3-pip$ pip3--version # to confirm
- From here: https://pip.pypa.io/en/stable/installing/
- Matplotlib: comprehensive library for creating static, animated, and interactive visualizations in Python
- From here: https://matplotlib.org/stable/users/installing.html
$ pip install numpy- Probably: — Requirement already satisfied: numpy in /usr/lib/python3/dist-packages (1.17.4)
- From here: https://matplotlib.org/stable/users/installing.html
- Numpy: fundamental package for scientific computing with Python
- From here: https://numpy.org/install/
$ pip install numpy
- From here: https://numpy.org/install/
- RUST language:
- From here: https://www.rust-lang.org/tools/install
$ curl --proto '=https' --tlsv1.2 -sSf https://sh.rustup.rs | sh$ source $HOME/.cargo/env
- And for fish:
$ bass source $HOME/.cargo/env
- From here: https://www.rust-lang.org/tools/install
- VSCode: A light weight supported editor:
- From here: https://code.visualstudio.com/docs/setup/linux
- $ sudo
snap install --classic code - Extensions:
- – Python
- – C/C++
- – Rust
- – OpenCL
- – Bash Debug
- – Monokai++
- – Fish-vscode
- – Material icon
- – Pylance
- – GitLens
- (For my comfort) Go to settings -> Keyboard Shortcuts:
Copy Line Up: shift-alt-UpArrowCopy Down Up: shift-alt-DownArrow
- (For my comfort) Settings -> Search Tab Size
- Set Tab Size to
2
- Set Tab Size to
- $ sudo
- From here: https://code.visualstudio.com/docs/setup/linux
- Freecad: like autocad, but open source
- From here: https://wiki.freecadweb.org/Installing_on_Linux
$ sudo apt-get install freecad
- From here: https://wiki.freecadweb.org/Installing_on_Linux
- Okular: file reader better than ubuntu’s
- Here say’s that is on snap: https://apps.kde.org/okular/
$ sudo snap install okular
- Here say’s that is on snap: https://apps.kde.org/okular/
- Mesa utils: several basic GL utilities built by Mesa, including glxinfo and glxgears.
$ sudo apt install mesa-utils
- Locale: needed for ROS2
$ sudo apt update$ sudo apt install locales$ sudo locale-gen en_US en_US.UTF-8$ sudo update-locale LC_ALL=en_US.UTF-8 LANG=en_US.UTF-8-
$ export LANG=en_US.UTF-8
- ROS2-Foxy: Robotic OS, Foxy version
- From here: https://docs.ros.org/en/foxy/index.html
$ sudo apt update$ apt install curl gnupg2 lsb-release$ sudo curl -sSL https://raw.githubusercontent.com/ros/rosdistro/master/ros.key -o /usr/share/keyrings/ros-archive-keyring.gp$ sudo echo "deb [arch=$(dpkg --print-architecture) signed-by=/usr/share/keyrings/ros-archive-keyring.gpg] http://packages.ros.org/ros2/ubuntu $(lsb_release -cs) main" | tee /etc/apt/sources.list.d/ros2.list > /dev/null$ sudo apt update$apt install ros-foxy-desktop
- Env. set up bash:
$ source /opt/ros/foxy/setup.bash$ sudo apt install python3-argcomplete
- Env. set up fish:
$echo >> ~/.config/fish/conf.d/omf.fish "\
# ROS2 FOXY environment setup
bass source /opt/ros/foxy/setup.bash"
- From here: https://docs.ros.org/en/foxy/index.html
- Sweethome3d: open source SourceForge.net project distributed under GNU General
- From here: http://www.sweethome3d.com/download.jsp
- And here: https://howto-ubuntunew.blogspot.com/2017/10/how-to-install-sweet-home-3d-552.html
- Extract and:
$ sudo mv SweetHome3D-6.5.2 /opt/$ sudo gedit /usr/share/applications/sweethome3d-6.5.2.desktop- Paste this:
- Curl, Git, Xclip and Clinfo:
[Desktop Entry]
|
-
-
-
$ cd /opt/SweetHome3D-6.5.2$ sudo cp SweetHome3DIcon.png /usr/share/icons/
-
-
My set up in git: A repository to myself for modular installations
The latter guide is step-by-step guide to follow, but it stills requires a lot of actions from you. But let’s note something:
A lot of the installation process is hitting enter on the terminal, why don’t we automate it?

A quick guide for it would be:
- First step: Identify any command that can be done on bash and put it in a list that make sence (you wouldn’t put a
$ pip install..., before a$ sudo apt install python3-pip, the order in the guide is pretty much a guide for knowing how to order bash command, if you use fish LEAVE ANY SHELL COMMANDS AT LAST AND IN ANOTHER FILE, but do install fish there - Second step: Once you have the steps create a file with a name like
my_cool_setup.sh, removing all sudos and and make it executable.- Here consider adding a -y
$ apt install my-cool-program -y, this will remove the Yes/No asking, defaulting y
- Here consider adding a -y
- Third step: write down any step that is not done by terminal and put it in a document, maybe a
README.md😉 - Fourth step: Check that you have all your latter guide covered in you file
my_cool_setup.shand you readme - Fifth step: any step realted to fish, put it on another file like
my_cool_fish_setup.fishand put all the commands there. The first line should always be this:#!/usr/bin/env fish - Sixth Step: Run
my_cool_setup.sh, then runmy_cool_fish_setup.fish, while following theREADME.md.$ sudo ./my_cool_setup.sh$ sudo ./my_cool_setup.sh$ bass sudomy_cool_fish_setup.fish
(elegant) Example 1: https://gitlab.com/russbatisbarrrco/ubuntu_arcos_setup
(not so elegant) Example 2:
my_cool_setup.sh: The fil would look like this
# Todoist - https://snapcraft.io/todoist
snap install todoist   # sudo

# CopyQ - https://github.com/hluk/CopyQ
add-apt-repository ppa:hluk/copyq   # sudo
apt update    # sudo
apt install copyq -y    # sudo

# Albert - https://albertlauncher.github.io/installing/#using-official-albert-repositories
apt update    # sudo
curl "https://build.opensuse.org/projects/home:manuelschneid3r/public_key" | apt-key add -    # sudo
echo 'deb http://download.opensuse.org/repositories/home:/manuelschneid3r/xUbuntu_20.04/ /' | tee /etc/apt/sources.list.d/home:manuelschneid3r.list   # sudo
curl -fsSL https://download.opensuse.org/repositories/home:manuelschneid3r/xUbuntu_20.04/Release.key | gpg --dearmor | tee /etc/apt/trusted.gpg.d/home_manuelschneid3r.gpg > /dev/null    # sudo
apt update    # sudo
apt install albert -y   # sudo

# Terminator - https://terminator-gtk3.readthedocs.io/en/latest/#
add-apt-repository ppa:gnome-terminator   # sudo
apt-get update    # sudo
apt-get install terminator -y   # sudo
snap install --classic code -y    # sudo

# Powerline for bobthefish (oh-my-fish)
pip install --user powerline-status -y

# Fish - https://launchpad.net/~fish-shell/+archive/ubuntu/release-3
apt-add-repository ppa:fish-shell/release-3   # sudo
apt-get update    # sudo
apt-get install fish -y   # sudo
(echo "/bin/fish") >> /etc/shells   # sudo
chsh -s /bin/fish

# Curl - https://curl.se
apt install curl -y   # sudo

# Git - https://git-scm.com/
apt install git -y   # sudo

# Xclip - https://github.com/astrand/xclip
apt install xclip -y   # sudo

# Pip
apt install python3-pip    # sudo

# Matplotlib - https://matplotlib.org/stable/users/installing.html
python3 -m pip install -U pip
python3 -m pip install -U matplotlib -y

# Numpy - https://numpy.org/install/
pip install numpy

# RUST - https://www.rust-lang.org/tools/install
curl --proto '=https' --tlsv1.2 -sSf https://sh.rustup.rs | sh
source $HOME/.cargo/env

# Freecad - https://wiki.freecadweb.org/Installing_on_Linux
apt-get install freecad -y    # sudo

# For glxinfo - `apt search glxinfo` - https://dri.freedesktop.org/wiki/glxinfo/
apt install mesa-utils -y   # sudo

# clinfo - `apt search glxinfo` - https://github.com/Oblomov/clinfo
apt install clinfo

# For VScode - https://code.visualstudio.com/docs/setup/linux
snap install --classic code

# For Okular - https://apps.kde.org/okular/ -> snap store
snap install okular

# Telegram - https://snapcraft.io/telegram-desktop
snap install telegram-desktop

# ROS2 install - https://docs.ros.org/en/foxy/Installation/Ubuntu-Install-Debians.html

# Locale (needed for ROS2)
apt update
apt install locales
locale-gen en_US en_US.UTF-8
update-locale LC_ALL=en_US.UTF-8 LANG=en_US.UTF-8
export LANG=en_US.UTF-8

# ROS2
apt update    # sudo
apt install curl gnupg2 lsb-release  -y # sudo
curl -sSL https://raw.githubusercontent.com/ros/rosdistro/master/ros.key -o /usr/share/keyrings/ros-archive-keyring.gpg   # sudo
echo "deb [arch=$(dpkg --print-architecture) signed-by=/usr/share/keyrings/ros-archive-keyring.gpg] http://packages.ros.org/ros2/ubuntu $(lsb_release -cs) main" | tee /etc/apt/sources.list.d/ros2.list > /dev/null    # sudo
apt update    # sudo
apt install ros-foxy-desktop -y   # sudo

# Setup ROS2 in bash
source /opt/ros/foxy/setup.bash
apt install -y python3-argcomplete    # sudo
The run:
$ chmod +x my_cool_setup.sh # this makes the file executable
$ ./my_cool_setup.sh
Then create my_cool_fish_setup.fish like this:
#!/usr/bin/env fish

# oh-my-fish - https://github.com/oh-my-fish/oh-my-fish
curl -L https://get.oh-my.fish | fish

# omf config path
set omf_config ~/.config/fish/conf.d/omf.fish


# bobthefish - https://github.com/oh-my-fish/theme-bobthefish
omf install bobthefish
omf theme bobthefish

# bass - https://github.com/edc/bass
omf install bass

# Setup RUST environment setting in fish - https://www.rust-lang.org/tools/install
bass source $HOME/.cargo/env

# Setup ROS2 in fish - https://docs.ros.org/en/foxy/Installation.html
echo >> $omf_config "\
# ROS2 FOXY environment setup
bass source /opt/ros/foxy/setup.bash"
Then add all the steps that cannot be done from the command line, like adding shortcuts, VSCode extension, intstalling sweethome3d, and so on.
This comes in very nice doing a git repo for your set up!